Tuesday, December 21, 2010
Chocolate Peanut Buttery Goodness

Monday, May 10, 2010
I Know What You Did at The Check Out Line
I seem to be wacky things lately. First, I copied down a recipe off a magazine at the doctor's office. Ok, well apparently, it runs in the family because my mother and sister do it too. But then, as if trying to stand out more than I already do, I had to do another thing; memorize a recipe in a magazine at Albertson's check out line.
I have to tell the truth. I hate those check out lines. Why? Because they are always littered with tabloids usually displaying lewd pictures, and I hate that my children have to see those. So we always tell them to wait for us at the other end of the check out line. At Meijer's they had those coin-eating horses that we could redirect the kids to, but here, there ain't much choice. But the kids seem to know why we always tell them to go, so they do.
I have to tell another truth. i love those check out lines. Why? Because they are adorned with home and cooking magazines usually displaying scrumptious food pictures, and I love that I could pick them up and browse through them while hubby and kids unload the cart and wait to pay. I especially love it when the line is long, though many times, I've had to cut my reading short because customers are coming in behind me. At times I get the question,
"Are you in line?"
I know. I'm annoying.
But this time, I did what I never thought of doing before. I was browsing through this cooking magazine whose name I don't even remember, and I my greedy eyes landed upon a luscious cake. I fell in love. Head over heels. I beckoned for S to come and help me out. I don't remember how it came about, but I whispered surreptitiously to her,
"Ski, you think you can help me memorize this recipe?"
I read and reread the recipe. A cake recipe is quite familiar to me now, and one that involves egg separation, I am also familiar with, so memorizing the recipe was a cinch. It was mostly common sense with a little baking know how. The ingredients was the challenge. So we ended up memorizing the ingredients. Right there and then. I looked up to see hubs completing his payment.
"Hurry, S. You think you got it?"
And like a good obedient daughter, she obeyed me. I could almost see her the clockwork in her brain. She slowly nodded.
As we walked out the store, I quickly rummaged in my messy handbag, looking for a notepad and pen (which I always have anyway). Aha! And on the way to the parking lot, I quickly scribbled the memorized ingredient list, thereby creating quite a sight to behold: an abaya clad woman, face covered, not looking where she was going, hastily scribbling something on a notepad while walking towards her car, following her husband and children. Oh well, who cares? I already am a sight to behold with the niqab anyway.
So for quite some time, the recipe sat in my handbag, untouched. My fervor had dissipated, though it was at the back of my mind. Then a few weeks ago, we bought heavy whipping cream because I wanted to make Swiss rolls. But I only used one carton. The other 1 pint carton was still sitting in the fridge, awaiting a gruesome death at the hands of a neglectful owner. Well, neglectful I am not, for I finally rescued that carton of heavy whipping cream from such an end !
With the help of my lovely children, I made the Strawberry Tres Leches. That reminds me. Getting the strawberry jam for this was not straightforward. I try to avoid non organic berries now, because they are one of the fruits that are high in pesticide. So when we set out to buy jam for the cake filling, we had a dilemma. H, my son, was with me at the time. he forgoed jam for bread and we bought an organic raspberry jam for the cake instead of strawberry because they were out of strawberry. And with that, I present ...
For the cake:
5 eggs separated
1 C sugar, divided 3/4 C and 1/4 C
1/4 C milk
1 ts vanilla
1 1/2 C flour
1 1/2 tsp baking powder
For the milk combo:
2/3 C milk
2/3 C sweetened condensed milk
2/3 C evaporated milk
About 1 C strawberry/rasberry jam, slightly warmed for easy spreading
1/2 - 1 C heavy whipping cream
1-4 Tbs powdered sugar
1. Preheat over to 350 Fahrenheit and grease a 9 in springform pan
2. Beat the yolks with the 3/4 C sugar until light colored and fluffy
3. Combine the flour with baking powder and mix well, then add it to the egg mixture alternately with the milk in 2-3 additions, beating well after each addition. That basically means, add 1/3 of the dry ingredients, then mix well, stop, add 1/2 of the milk, mix well, stop, add another 1/3 of flour mixture, mix well, stop, add rest of milk, mix well, stop, add remaining flour mixture, mix well
4. In another bowl that is free of grease or egg yolk, beat the egg whites till foamy and then gradually, add the 1/4 C sugar until stiff peaks form.
5. Plop one peaked spatula of egg white onto the egg yolk mixture and fold in gently. Then fold in the rest of the whites until thoroughly combined
6. Bake 40 minutes or until toothpick inserted in the center comes out clean
7. Cool in pan 10 minutes. Then invert onto cooling rack and cool completely
8. Now this is the fun part: Like a crazed person, poke as many holes as you can in the cake from the top with a cake tester or or skewer. Have a go at it! But just be sure not to tear the cake apart while you're at it. You just want to make enough holes so the milk combo can soak through the whole cake.
9. When you're done a-pokin', place the cake in a container with sides that is slightly bigger than the diameter of the cake. Then combine the 3 milk and pour onto the cake.
10. Refrigerate overnight.
11. By the next day, the cake should be drenched and have soaked up all the milk solution. Invert onto a large plate and prepare to slice the cake horizonatally into half. I used a serrated knife and did some guesswork. It was a little tricky because the cake is so soaked that when I placed my hand on the top while cutting, it wet my hand, so I used a cake insert just so my hand won't get wet from the milk.
12. Spread the jam over the bottom half of the cake and carefully, very carefully (since the cake is wet and can break easily) place the top half inside part down over the jam.
13. Beat the heavy cream with powdered sugar until it looks like whipped cream. Be careful not to overbeat or it will curdle. If it does, you can rectify this by adding more heavy cream, but if you don't have anymore on hand, you're in big trouble.
14. Spread whipped cream on top of cake. Best eaten chilled.
I had made a Tres Leches cake before, but it was a different recipe. I think we all like this one better. Now the next time I'm at a check out line, I know what to do.
Saturday, May 1, 2010
Say Cheese!

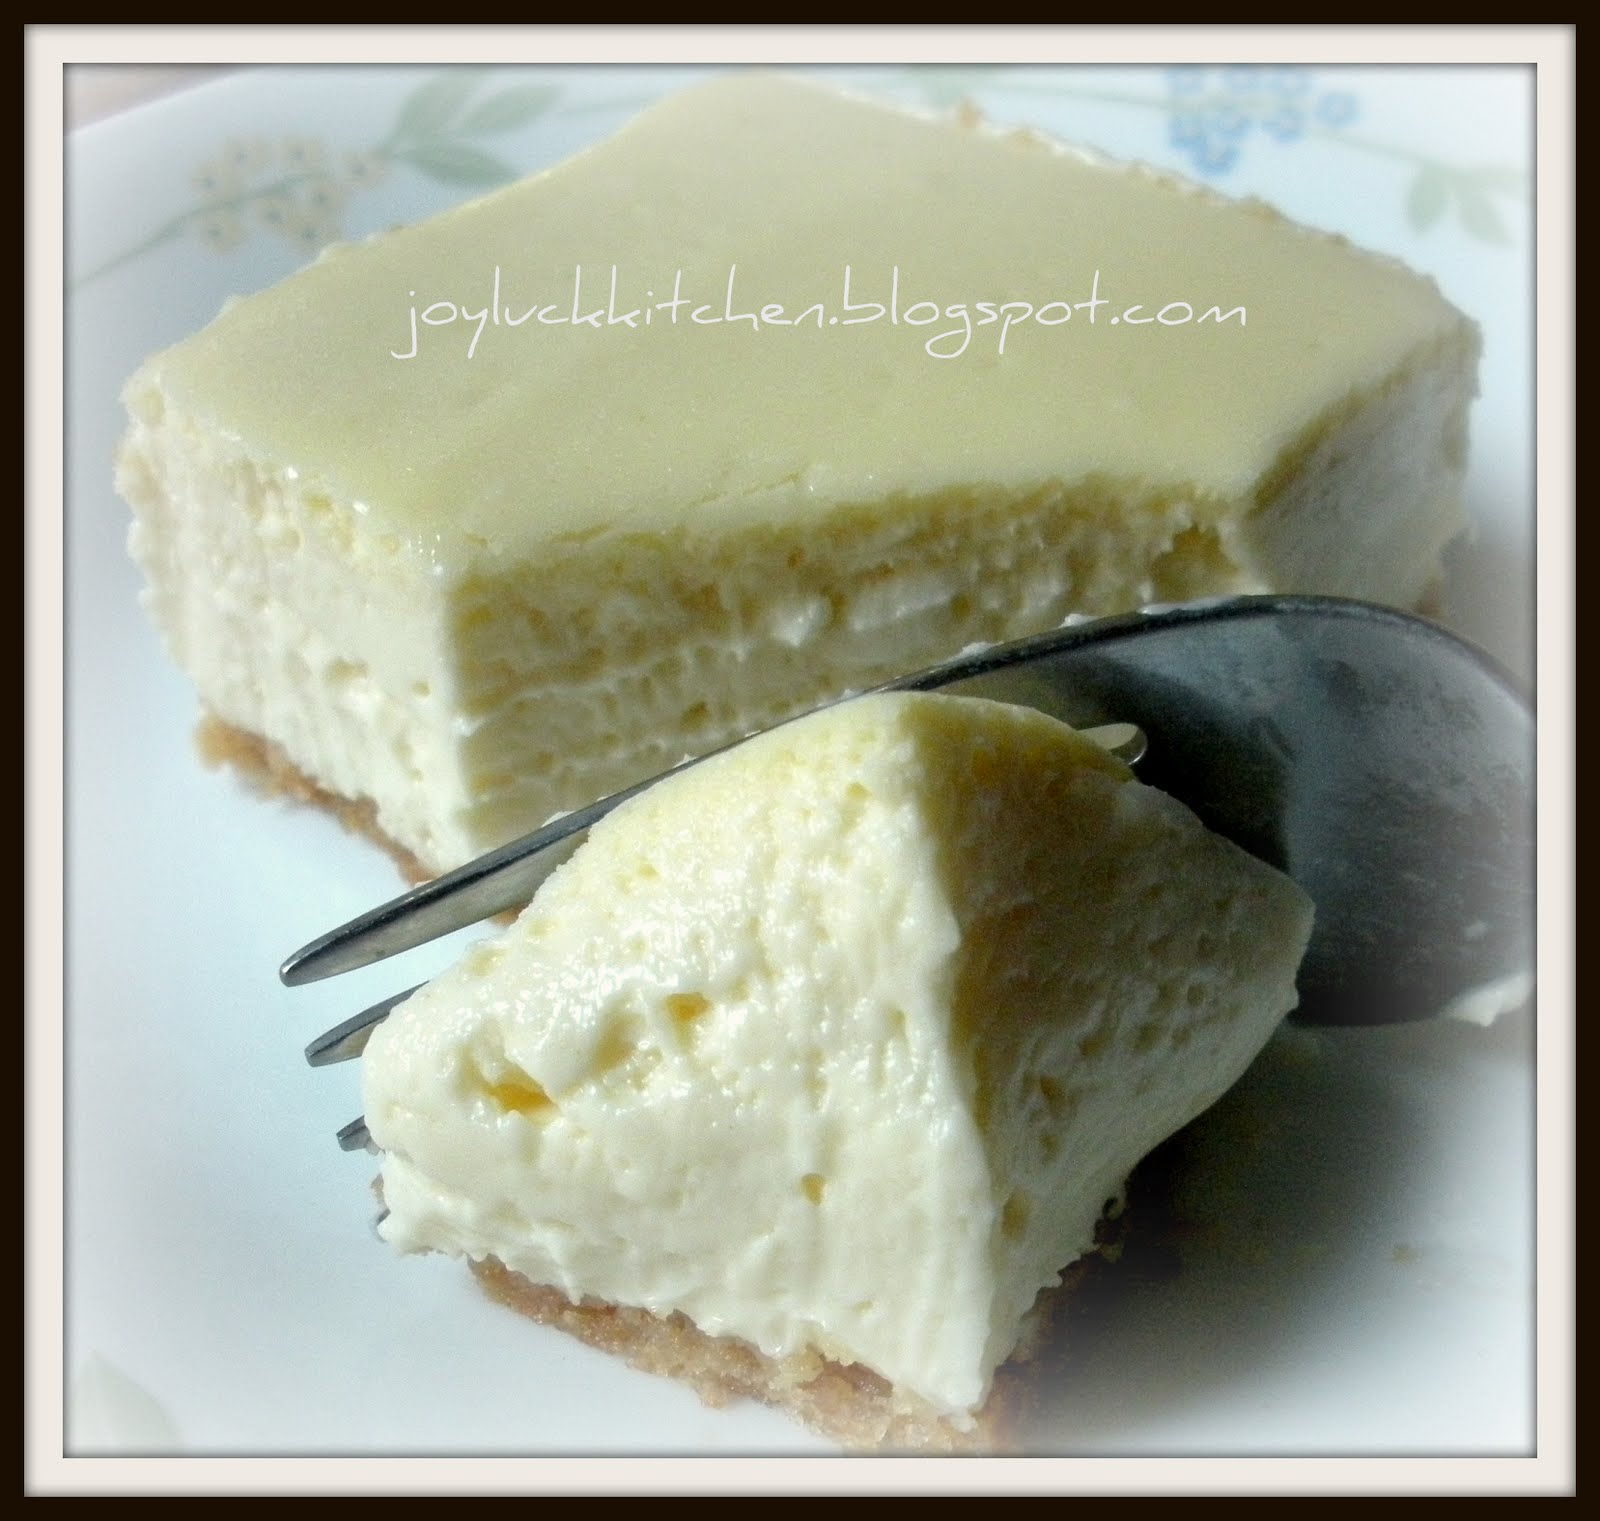
It's creamy, rich yet not too overpowering, light yet not airy. It was perfect. I only wish I had a topping to pour on this off white smooth-topped cheesecake.
I rarely do this (not out of aversion, but more out of laziness), but this time I did. At the doctor's office, I picked up a magazine, flipped through it, and a photo of a scrumptious cheesecake caught my eye. Without thinking, I quickly rummaged through my purse for a pen and notepad, and copied down the recipe.
The recipe remained on the bulletin board near my work station for weeks, a month maybe, before I actually did something about it. My Taleem classes and homeschooling left me little time to indulge in extra kitchen activities. But I had snared myself into the trap. I bought the cream cheese when we went shopping, and so, that morning, I took out the cream cheese boxes and left them on the counter so they could come to room temperature.
By the time they did though, I was too lazy, spent, and exhausted to make the darn cheesecake. I was about to put the cream cheese back in the fridge, when the kids offered to help. They must have really wanted that cheesecake. So, somewhat reluctantly, I agreed, and before long, I had kids crushing the graham crackers, melting butter, patting the crushed crackers mixed with butter onto the bottom of the pan and the rest was a breeze. Without these helping hands, I would have probably ditched my intention to make this cheesecake and used the cream cheese for eating with pita bread and graham crackers for snack.
I didn't use Philadelphia cream cheese though, but it still tasted delish. Why didn't I use it? I was being frugal. My only reason. I also used more than 6 graham crackers. I think I probably used about 10-12 graham crackers.

6 graham crackers crushed (I dumped about 10-12 graham crackers in a bowl and handed my kids a pestle and told them to crush them crackers to bits)
1 C sugar
3 Tbs sugar (keep this separate for the crust)
3 Tbs butter, melted (courtesy of one of the kids. I forgot which one)
5 8 oz. packages cream cheese, softened (that basically means, you leave it at room temperature)
3 Tbs flour
1 Tbs vanilla
1 C sour cream (at room temperature)
4 eggs
1. Preheat the oven to 325 F. Prepare a 13x9 rectangular pan (if you have one with a removable bottom, that would be even better). No need to butter the pan.
2. Combine crushed graham crackers with 3 Tbs sugar and melted butter
3. Dump this mixture into the pan, and using the bottom of a measuring cup or hand slipped in small ziploc, press it so it forms an even crust in the pan. No need to push it up the sides. Just cover the bottom.
4. Bake 10 minutes. Cool.
5. At low to medium speed, cream cream cheese, sugar (the 1 C), flour and vanilla till smooth
6. Add sour cream and continue mixing
7. On low speed, add eggs one at a time, beating till smooth after each. Do NOT overbeat.
8. Bake 40 minutes or till the center almost sets. I usually do a jiggle test. I hold the pan and slightly shake it. If the center jiggles like jelly but doesn't slosh over, it's done.
9. Cool completely
10. Refrigerate 4 hours (and this was where the kids groaned. After all the helping they did, I guess they had a right to groan like they did.)

But it's definitely worth it.
Thursday, July 30, 2009
Simple No-Bake Cheesecake Recipe

This is a recipe that I had used a few years ago to make cheesecake. Of course, the non-baked cheesecake tastes different than the baked ones but this is a good idea for times when you are in a hurry and yet want to make a good dessert :)
Ingredients: (Serves 6-8)
- 8 oz Cool Whip Free (take it out 10 minutes before using)
- 16 oz 1/3 less fat Philadelphia Cream Cheese (softened)
- 9 inch reduced fat Graham Cracker Crust/Or you can make your own crust by combing butter and cookie crumbs
- 1/4 cup sugar (can do acc. to taste as well, I have found some recipes which state 1/2 cup)
- 1 pack of Halal Lemon Jello/Jelly
- 1 jar/can of cheesecake topping (I don't like tasting big chunks of fruit so I get Smuckers brand 'Toppings').
Method:
1. In a large bowl, combine whipped cream cheese, lemon jello and sugar for a few minutes until fluffy.
2. Add Cool Whip and whip until smooth. You can use an electric mixer too but make sure you don't over beat (you want soft peaks in the mix, s that it's fluffy and not stiff).
3. In the meantime, you can crush 6 or 7 gram crackers and melt just enough butter (this needs to be adjusted according to how thick you want your crust to be and how big your dish is) to nicely pack the bottom of a springform/any other tray to form the crust.
3. Spoon mixture into pie crust and chill for a few hours, until firm. I usually let it just sit overnight when I can.
Cut into 6/8 equal slices.
Alternate serving option:
Serve just the cheesecake mix as a mousse, with graham crackers on the side as opposed to forming a crust with them.

Picture from: http://www.viecouture.net/wp-content/uploads/2008/02/strawberry_cheesecake_squares.jpg
Tuesday, July 14, 2009
If You Have Bananas and Sour Cream...
I love this recipe. I have made banana breads and banana cakes, but by far, I love this recipe the most. I love Rose Beranbaum's cake recipes. Period. This is by far the most tender and yummiest banana cake I have ever tasted. I attribute it all to the sour cream and mixing technique. One thing I love about Rose's cake recipes is that she incorporates her knowledge in food science into her cookbooks. I am a lover of recipe elaborations, explanations, tips and the like. This may have been due to my lack of knowledge in cooking and baking in the first place when I first became a wife, such that when I tried recipes of Malaysian food, many turned out into chicken feed. For years I gave up trying and focused on baking and western cookbooks instead, as they are more like chemistry, and should I say, more organized (well most are at least). And after gaining some food chemistry know how, I returned to my attempts at Malaysian food, and lo and behold, alhamdulillah, at least some of them were fit for consumption.Anyway, like I said, this is by far my favorite banana cake recipe. The sour cream produces a very tender cake, and the lemon zest lends a delightful fragrance and wonderful tang, in addition to the sour cream. If you don't like your banana cake to look brown though, put off blending the bananas until you're ready with the dry ingredients, so they don't have time to oxidize (did I tell you I love food facts?), and you will get a light colored banana cake, with Allah's permission. It is also from this recipe that I concocted an allergy free version for Zeyoudee, which can be found here.
Taken from Rose Beranbaum's Cake Bible,
2 large ripe bananas (about 1 cup)
2 Tbs sour cream (for extra moistness you can use up to 1/2 cup)
2 eggs
2 tsp grated lemon zest
1 1/2 tsp vanilla
2 C sifted cake flour
3/4 C + 2 tsp sugar
1 tsp baking soda
3/4 tsp baking powder
1/2 tsp salt
10 Tbs unsalted butter, softened
1. Preheat oven to 350 F and grease and line pans. You can use an 8x8, or one 9 inch by 2 round pan or even a 9 inch springform pan.
2. In a food processor, or blender, blend the bananas and sour cream until smooth. Then add eggs, lemon zest, and vanilla and blend briefly, just to blend.
3. In a large mixing bowl, combine the dry ingredients (cake flour, sugar, baking soda, baking powder and salt) and mix on low speed for 30 seconds to blend
4. Add the softened butter and half of the banana mixture. Mix on low speed until the dry ingredients are moistened.
5. Increase to medium speed (high speed if using hand mixer) and beat for 1 1/2 minutes
6. Add the rest of the banana mixture in two batches, and make sure to scrape down the sides between each addition. The batter will develop beautifully as you continue beating (the beauty is in the technique Rose has developed)
7. Pour batter into the prepared pan/s and smooth the surface. I always create a slight dip in the middle of the batter and bring them to the sides so that when the cake naturally domes, it will be somewhat level and not too domed in the middle.
8. Bake 30 to 40 minutes or till cake springs back when lightly pressed.
9. Cool cake in pan on a cooling rack for about 10 minutes, and then invert cake out of pan and cool completely.

Or you can also immediately dig in while it's still hot, and emanating a wafting aroma of banana and lemon. At least that's what my son did, despite me telling him to leave some for his father. I had sliced the square cake into strips and let them eat half of the cake and they devoured it uninhibitedly of course. I left, and when I returned, the other half was literally butchered, the culprit having moved away from the crime scene as far as he could. At the end of the day, there were two pieces left in the pan which went in the fridge. When I saw it, I told hubby and believe it or not, when he went for those pieces later on, he found the pan empty (but still in the fridge).
"Good joke, good joke!" he said.
Alas, he didn't get a taste of that cake. The kids beat him to it. He took revenge (not sure for that particular incident or an accumulated ice cream incidents in whci the kids would eat almost the whole tub and leave a measly bit for their parents) by eating more than half of the tub of ice cream. When the kids took the tub out to get some, they exclaimed,
"Hey! Who ate so much?"
Of course, they accused each other, and when it turned out that none of them did it, and hey, I didn't do it, the only person left to accuse was their father. Ahh...revenge is truly sweet when it involves ice cream. I guess.
Saturday, December 13, 2008
Pound Cake

If you're like me, you've been eating pound cake ever since you were a little kid. I remember my mom bringing it back each time she went grocery shopping. It's ridiculously easy to make, I almost didn't believe it when it turned out so good. I say this all the time, but if it worked out for me, it'll work out for you.

Saturday, November 15, 2008
O-HI-O
A Malaysian brother's graduation. Perfect! An occasion to bake and decorate a cake for. An excuse to fling open the restless idea box in my head. An excuse to launch yet another experiment. A reason to practice my cake decorating skills. I can almost feel the itch consuming my hands at the time, as I'm typing this now, years later.
Hubby had volunteered to organize a graduation celebration gathering for the brother, whose parents had come all the way from Malaysia. The gathering was done at our place, and the cake was to be a surprise.
I don't remember exactly how I came about with the idea for an OSU cake, but then again, the previous graduation cake I had made for the Malaysian brothers was OSU in nature too. However, the first thing I did to botch this cake up was the color of the base cake; pink. Malaysian brother, pink. Get it? Uh uh, not a good color, though those of you who notice that Malaysians tend to be 'colorful' may think,
Isn't that normal though? Their men wear purple, green, pastels, so why not pink?
Well, I guess some of our men do wear pink, but I personally wouldn't associate my boys, or husband for that matter with the color pink. So, to me, it was a flaw. The first flaw for this cake.
However, it took so much coloring to make it dark red, and I didn't want to use more lest we end up with more red coloring than the cake in our tummies, so I settled with dark pink. The bottom tier were two 10 inch cakes, filled and frosted with buttercream. I had somehow managed to get a portion of the frosting dark red (it takes some time for the color to take on a deeper and darker shade), and I used it for the borders.
Since there were about 20 and more people coming, I decided to make a two-tiered cake. It had to be OSU in nature. OSU it was. It was difficult to get that black too (which was actually a very dark gray), but I got it. At least it looked black.
I baked two 8 inch cakes for the top tier, and carved them out, using a template I had made out on parchment paper, so they would have the outline of the Ohio State logo. I filled and frosted the carved cakes, and voila, I had a perfectly clean slate to make my OSU logo. From there on, it was ... nerve-wrecking cake decorating. I couldn't botch that up.
Looking back, I should have made the top tier 6 inches, because 2 inches of a difference is not enough for a two-tiered cake. I had thought that the carving would make the 8 inch cakes smaller, but I was wrong. Another botch up. Sigh...
Making the Ohio State logo was definitely not easy. I used a toothpick and carefully drew it out on my clean slate. The nice thing about it, is, when I made mistakes, I could easily 'erase' it by smoothing out the frosting, and start over.I do believe this would have been easier with rolled buttercream or rolled fondant though.
The base or bottom tier was easy. It was like any other cake I've decorated; straightforwardly border making and writing. For this cake project, I had also decided to test a principle in Physics as an excuse to saving some dollars. Since a hollow cylinder is supposed to be stronger than a solid cylinder, I decided to test it out by using straws instead of buying some dowel rods at the cake store. And of course I had to botch things up yet again. After poking all the straws deep into the bottom tier, I realized that I hadn't cut them all at the same precise length. I debated whether to take them all out and cut new straws, but I held back, and moved on. From the photo below, you can even see that the placements of those straws were not carefully planned. Ahh...the work of a beginner.
Nevertheless, the unevenness was not so much as to make it all a big embarassing flop. The straws did their job and that principle in Physics was proved true, and my dollars saved. The top tier did seem to float awkwardly above the bottom tier though, since the height of the straws were not precisely the same, and I had cut them a little taller than they should have been.
All in all, I wasn't completely happy with this cake, as my perfectionist eyes saw all the glaring flaws, but it made the brother happy, so I guess, I couldn't ask for more. Alhamdulillah! It was homemade, customized, and full of faults. The cake didn't turn out as perfect as I wanted it to be, but alhamdulillah, I committed mistakes that I could learn from. Looking at this cake, I will always remember the 4 inch rule: the difference between the diameter of the bottom and immediate top tier would best be 4 inches, not less, not more. And of course, the straws...I will never forget those straws.
Thursday, November 13, 2008
A Squeal, A Whoop of Joy!
We had bought combs upon combs of banana so Z and I would have easy accessible snacks. Of course, after a while, these bananas screamed to be used up in something because they were starting to freckle. I had already made the allergy free Jemput Jemput, and on the same day, I had also made two banana cakes, allergy free, but they were not satisfactory at all.
So, I decided to have another go at it, this time, incorporating my baking know how, alternating the dry ingredients with the wet ingredients. I decided to stick with coconut milk for the liquid. Rose Beranbaum's recipe for Cordon Rose Banana Cake had used sour cream, and so far, this cake is the BEST banana cake I've ever tasted in my life, and I have tried quite a few banana cake recipes. So I figured I'd best be sticking to a creamy liquid in my recipe.

On my first try, I forgot to include sugar, but I also thought I didn't need it because the bananas were already sweet. When the cake was done, I took it out. I had peeked while it was baking, and when I saw it rise, my heart leapt for joy, but I told myself not to be too excited because it could still turn out to be a flop. So, I took it out when it was done, and let it cool in the pan on the cooling rack before I inverted it and took it out. While it was cooling, I cleaned the kitchen. I tried hard to ignore it, for fear of facing yet another disappointment of a hard rock and untasty cake after so much work of deciding a measured amount of flour and other ingredients and writing them down on one of my recycled grocery lists paper.
But I finally could not ignore the cake any longer, and I gingerly inverted it. I couldn't help myself, so I lightly pressed it. It sprung back. My heart started to beat faster. I grabbed a knife, and started slicing. It was soft. My heart felt lighter. I took one cut piece. It felt fluffy and tender. My heart probably grew wings. I put the piece in my mouth. Heaven! My heart leapt right out along with my voice,
"Kids!!!!!!!!!!!!!! Come !!!!!!!"
They were all upstairs playing 'Sultan's kids'. They bounded down the stairs. One by one, they popped a piece of banana cake and nodded their approval. I squealed. Now I know how Alexander Graham Bell felt.
The first cake lacked sugar, and at first it tasted bland, but after a while, you could taste the banana. I decided to have a second go though, this time, adding 5 tablespoons sugar.
Meanwhile, Zeyoudee had his first cake, and the rest of us couldn't keep our hands off the cake, and before I knew it, there was no more First Banana Cake left. The second try was baking in the oven, and I peeked again. It rose. Alhamdulillah!
When it was done, cooled and all, well, maybe not all the way through, but I couldn't wait anymore, I cut it. It was gummy. I felt a tad disappointed, blaming the sugar, but after a while I realized that it was underbaked. I had taken it out too soon. So I still consider it a success, allahu akbar!
Personally I prefer the sugarless one though. It is healthier. So I have cut down the sugar to only 3 tablespoons in this recipe.

1 C blended banana
1/2 C coconut milk
3 Tbs sugar
1/2 C brown rice flour
1/4 C sweet potato starch
1/4 C buckwheat flour
1 tsp salt
2 tsp baking powder
1 tsp baking soda
2 egg replacers (3 tsp Egg Replacer + 4 tbs warm water)
2 tsp oil
Preheat oven to 350 Fahrenheit. Lightly oil an 8 inch round cake pan, bottom and sides, and line the bottom with parchment paper, and lightly oil the top side of the parchment paper too. Sprinkle some brown rice flour, and shake the pan to distribute the flour across the greased bottom and sides of the pan, and dump out the excess.
1. Combine blended bananas, egg replacers, sugar, beat till combined, then add oil and beat again
2. Meanwhile, combine flours, baking powder, baking soda, and salt in a separate bowl and stir to distribute them evenly
3. Add the dry ingredients in 3 additions alternating with coconut milk, meaning, you first add a couple spoonfuls of the dry mix to the banana-egg mix and beat it till combined. Then you add 1/3 -1/2 of the coconut milk and beat till combined. Then add the dry mix again and keep alternating, but make sure you end with the dry mix. Here, on Chef Talk, the science behind this alternating method of mixing is explained.
4. Bake in 8 in cake pan (greased) for 20-25 minutes or till it springs back when lightly pressed
5. Cool cake in pan on cooling rack for 10 minutes
6. Slide knife around the edges to loosen the cake, invert it onto the rack and slide the pan off. Cool cake completely on the rack.
Cook's Notes:
- I used Ener G egg replacers. The directions for use is on the box.
- Make sure you blend the banana in a blender till smooth. This is so you get a smooth consistency for the cake. Mashing the banana will not result in a smoothly textured cake.
- Instead of using butter or Baker's Joy spray to grease the pan, I suggested using oil, to make this truly dairy free.
Monday, November 3, 2008
Tiramisu II
Since making tiramisu for the first time, I knew there were tons of changes I was going to make. First and foremost, I don't like cheese that much :D that's no secret, so I was going to use MUCH less cheese, and I was going to skip the eggs- something about raw eggs didn't sit well with me :) I also used Jell-O instant vanilla mix after a sister advised me that it tastes much better this way. I served my cake to guests over the weekend and it was a hit!
So follow this recipe and make the following changes IF you're not much of a cheese fan or looking for more of a vanilla flavour in your cake
* Add one and a half packs of vanilla flavoured Jello-O instant pudding mix
* Skip the eggs
* add only 6 tablespoons of mascarpone cheese
* Add 2 cups of cream
* Keep everything else the same
Notes
- I served each slice with a scoop of french vanilla ice cream :)
Sunday, November 2, 2008
No Bake Cake
When my Egyptian friend served us this creamy and very rich dessert, she served it in a glass casserole dish. When I asked her if it had a name, she just shrugged and said no. Curious, I spooned a scoop on my plate. To be honest, the blob on my plate didn’t look too appetizing. It was creamy white with light brown lines making haphazard patterns.
As soon as it hit my taste buds, my senses went wild with ecstasy. Okay, maybe that’s taking it too far, but it tasted rather like very creamy ice cream. It was chilled. The texture was akin to a moist, fluffy cake. I started with a scoop, but I found myself getting second, third and maybe fourth helpings of it. I couldn’t believe something so uncontoured, unrefined, and with no name, could taste so good.
I asked her how she made it. She showed me the two main ingredients: the tea biscuit (ULKER) and the Nestle table cream.
I took her instructions and modified it to produce something that is somewhat pleasing to look at. I was excited at the thought. However, that table cream is not too cheap around here, so we limited the frequency of making this chilled dessert with no name. Of course once I set to work, I set the kids to work too.
“We need to name this, kids. What do you think we should call it?”
I don’t remember what transpired after that question, but eventually we ended up with Biscake, as it is basically made from biscuits, but tastes like cake.
I have to warn those who are taking this recipe though. I am not a skilled recipe-maker. I have tried jotting down the exact amount of ingredients needed, but they sometimes vary each time, so make sure you have extra ingredients just in case. I have had to send hubby to the store to get more cans of table cream in the midst of making the Biscake.
1 packet of the Ulker tea biscuits
3/4 cans of Nestle table cream
1-2 tablespoons sweetened condensed milk
a cake pan with removable bottom (springform pan), or any container
1. Pour all contents of table cream cans into a big bowl
2. Add in the sweetened condensed milk and stir till thoroughly combined
3. Dip each biscuit in the cream, making sure to have it thoroughly coated
4. Arrange biscuits in container/cake pan, creating your own design
5. Cover and chill overnight
6. When ready to serve, depending on what container it’s made in, it can be scooped out or presented as a cake (if using the cake pan with removable bottom
*I was into cake decorating. Well, I still am, except I don’t do it anymore due to complicated logistics. So when I was about to modify the recipe, my mind sought to make it such that I could utilize the arrangements of the biscuits to create a design. I also figured that I could use my pans with removable bottom so I could serve it like a cake rather than serving it like ice cream or pudding. Just the thought of that would-be design sent shivers of excitement up my fingers.
So if you do use a pan with removable bottom, when you are about to take the ‘cake’ out, run a knife along the sides of the pan, and loosen the sides of the pan so the cake is left resting on the bottom of the pan. And voila! You have a beautiful masterpiece!
Saturday, November 1, 2008
Carousel Cake

We were going to have the Malaysians over for lunch. I was itching to make a cake. I owed one to my oldest daughter, for graduating to the two wheeler from the four wheeler. Hubby had a 4.0 GPA that quarter. And the other two kids had accomplishments of their own that merited celebrating. I was leafing through my Creative Cakes three ring book, whose contents I had amassed from my days in Iowa, and my searching gaze fell upon a clown carousel cake.
I knew then what I wanted to make; a carousel cake of my own. Only, I couldn't make horses, since I didn't want to make animate beings. And since I owed my daughter a cake to celebrate her graduating to a two-wheeler, I thought,
Hmm..what about bikes?
I could feel my brain cranking up immediately. Ideas sprouted like wild dandelions across a wild expanse of the prairie. You could see yellow everywhere, and in my case, a mother of three who couldn't hear what was said to her because she was a world of her own. Excitement suffused me like the sun's warm rays on a bright sunny day. My creative side thrived and throbbed with anticipation of the inevitable outcome. When I am struck by all the above, something usually comes out, in one form or another.
I had never constructed such a cake before, so I started by looking at cake pictures by experts and amateurs alike both online and in books and magazines. Trips to the libraries were then rewarded by handful of cake decorating books. What can I say? I love research.
I figured out the base pretty easily, but it was the carousel that took some planning. For the bicycles, I decided to draw a template of a bicycle outline and use it as my guide for making 'bicycle cookies'. I rolled out some sugar cookie dough, and cut out four bicycle shapes, one for each of my children and husband, and baked them (the cookies, not my husband and children).
Of course, before actually doing any of these, I took out my sketch book, which serves as the documentation of these ideas in my head, which I use for both cake decorating and sewing, and on occasion, sketching for the sake of sketching itself. Yes, I have my mother's genes. I used to spend my time sketching; the gates of our three storey apartment when I was 15, the fatherly swivel chair in the living room, and the scene (which included the Stadium's top) from my perch atop the slope near Lincoln Tower while my husband was playing basketball with the Malaysian brothers. I don't sketch a lot anymore, mostly because I have found a new outlet for these creative attacks; the blogosphere.
So, I had the picture of the bicycle in mind before I went ahead and made the cookies in shapes of the bicycles. Come time to put the finer details on them, royal icing proved to be 'the man'. Though you can clearly see that my control of the piping bags were not that good, from the looks of the details on those bicycles. But I guess they make for a whimsical cake, well, at least that's my excuse.
Next came the issue of the carousel top. How should I construct them? Again, royal icing, and cookies. I made the triangular wedges from cookies, and iced them in different colors with the royal icing. The wide base of it, I supported with an 8-inch cake board, to which I adhered them all to with royal icing, the perfect dry hard glue. I had also spied these chocolate wafers at Aldi, and may I say I love the containers they come in! I still have them in my pantry. As the hidden pillar, I believe (and I say this because I had racked my brains trying to remember what I used but I can't for the life of me remember with certainty, 100% certainty that is. It was made 4 years ago!) I used an empty paper towel cardboard tube. So I glued the base of those triangular wedges to the 8-inch cake board and the tops along the circumference of the paper towel cardboard tube, which then automatically served as the hidden pillar inside the carousel top. In this tube, I stuffed goodies, some of which you could see at the top (the gum drops).
It took me literally days to make just the carousel top, because I had to wait for the royal icing to dry, and since it was my first time constructing such a cake, I had to also prepare for disasters and back ups, which never came to be, alhamdulillah!
Once the carousel top was done, all I had to make was the cake base, which was the easiest part of the cake, well, relatively. To make it even simpler, I decided to frost it using chocolate glaze instead of buttercream frosting. One: I didn't have time or patience, or energy to make buttercream frosting (I'm a from scratch person, so no ready-made frosting for me, even if I'm pressed for time). Two: making the chocolate glaze is easy, it involves just a blender and ingredients. Three: any mistakes is easily rectified with the chocolate glaze. The base decorating was fun too, as I stuck M&Ms almost everywhere, including my mouth.
Once I had the base ready, with bated breath, I took four chocolate wafers, and stuck each on four marked spots on the cake base, and thrusted them all the way to the bottom (yes, they make holes in the cake). Next, came the carousel top. Very gingerly, I placed the whole constructed top with a cake board as the base on the tops of those four standing chocolate wafers, and hoped and prayed they would hold. Alhamdulillah, they did.
The bicycles came next and voila! I have to say that the most memorable thing about this whole cake was that I was able to put it on a lazy Suzan, and actually turn it around and around, like a real carousel. Somehow, I can't seem to find that video in my folders. Oh well, you can use your imagination, can't you?
After this cake, I had a 'roller coaster' theme in my head, but to this day, I haven't made another elaborate fun cake such as this. Maybe I will, but I honestly don't know when. My children might make it before I would. Yes, I think they will. Once we settle down inshaallah.
Uh oh! I can feel the creative attack coming...
How to Decorate Cookies Using Royal Icing