Sunday, November 30, 2008

My Grandmother's Legacy


I grew up getting used to eating animal organs, such as intestines, lungs, and liver. But that's about it. Tongue, brain, hooves, and others, that's where I draw the line, or is it because I was never served those growing up?

It's pretty common to see animal organs cooked in many ways in both Malaysian and Indonesian dishes, but I would say that I see more of animal's internal organs in Indonesian cuisine, most probably because of Indonesia's rich cultural diversity. My father says,

"You can find more good food in Indonesia than Malaysia."

By that he meant more variety. And of course! Because Indonesia is comprised of so many islands, thus many tribes, ethnic variations, cultures and food compared to Malaysia. My father was also born and raised Indonesian, which would explain the indignant loyalty. In some ways, I feel a sense of loyalty to Indonesia too, because I was raised mostly eating Indonesian food, as my grandmother was the main cook for quite a number of years during my childhood.


I have to say I love the texture and chewiness of cow's intestines. Cubed, they are actually the main ingredient of this dish my grandmother would make for occasions like Eid when we held our open house events. I don't think people balked at the prospect of eating cow intestines, for Indonesian food is also now pretty common in Malaysia. For the record, I personally don't like to draw a definite distinct line between Indonesians and Malaysians, because I believe that we're not that different, but when discussing food, cultural differences, (in my humble opinion) have to be discerned, for it adds to the appreciation and knowledge of the discussion.

Soto is a dish mainly comprised of clear thin soup with meat and vegetables, eaten with vermicelli and compressed rice cakes. In Malaysia, Soto Ayam is well known, and is what I remember purchasing for some of my iftars at the evening bazaar in Malaysia while I was in college. There are many kinds of Soto, but Soto Ayam is the only Malaysian Soto I ate in Malaysia. Years back, an Indonesian sister made Soto Betawi, which I still crave now (not knowing how to make it myself). That was my second Indonesian Soto, but I have come to realize that Indonesia is really rich and abundant with many varieties of Soto, most of which sound and look delicious!

I have to admit, I don't know how to prepare animal organs for cooking, and I can just imagine my children's disgusted expressions if I do, seeing that they already feel weak in their knees watching me handle raw chicken. So, in my years of living far away from family, here in the United States, I have substituted cubed beef for the cubed intestines, and the Somali Global Mall's Halal Store, which sells beef cut sukhaar-style makes it even more convenient for me, as I don't have to spend time cubing chunky slabs of meat.


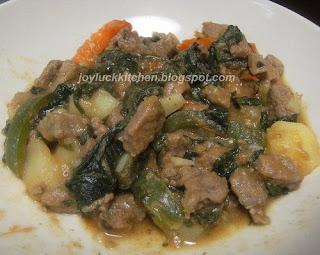
Fill your bowl with some vermicelli and a few rice cakes, and ladle the steaming soup, making sure to get a generous amount of cubed potatoes, carrots and meat. Garnish with fried shallots, and a small but potent dash of hot and spicy kicap sambal (mainly comprising of sliced bird's eye chilli swimming in sweet thick soy sauce and made tangy with lemon juice), and you're good to go.

This remains one of my favorite comfort food.

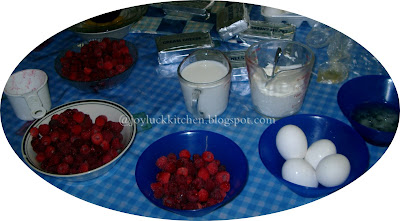
The measurements below are merely estimates, but the ratio of the meat, potatoes, and carrots to each other should be about the same.

Soto Madura


Beef cut sukhaar (as much as the potatoes and carrots) - boiled in 8 cups of water till fairly tender to your taste (keep the stock)
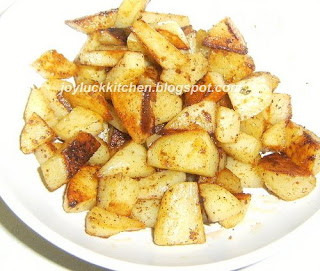
4 potatoes, peeled and finely cubed and soaked in water
4 carrots, peeled and finely cubed and soaked in water
2 onions cut into chunks
7 cloves of garlic
1 -2 lemongrass stalk, bruised
2 -3 dried asam gelugor
2 bay leaves
3 tsp ground turmeric
2-3 Tbs ground coriander
oil
squirts of lemon juice
5-6 bird's eye chillies
sweet thick soy sauce (llook for Indonesian brands)
vermicelli
Nasi Himpit (compressed rice cakes) - a good explanation and recipe on Pahang Delights.


1. Blend 1 onion and 3-4 garlic cloves with turmeric, coriander, and lemongrass
2. Pound or blend the remaining onion and garlic separately
3. Heat oil in tall stock pot, and saute the blended onion and garlic in Step 2 till fragrant
4. Add the blended mixture in Step 1, and continue sauteing to draw out the flavor of the spices and bulbs
5. Dump in the potatoes and carrots and and saute them along for about 5 - 7 minutes
6. Add in the beef, and water and bring to boil
7. Add in the bay leaves, a few squirts of lemon juice, and salt to taste
8. Prepare the vermicelli by submerging them in hot water until they're soft, then drain them and set aside

To prepare the spicy Kicap Sambal:
9. Put in a blender the bird's eye chillies and enough sweet soy sauce so they would blend smoothly. Blend till chillies are thoroughly broken up, and add a few squirts of lemon juice


How do you eat it? (Like you would chicken noodle soup!)

  1. Using a spaghetti server/tong, scoop one serving of vermicelli in an empty individual soup bowl. Add in a few cubed rice cakes.
  2. Ladle the Soto, replete with potatoes, beef, and carrots over it, such that the white thin rice noodles are swimming in the pool of yellowish soup.
  3. If you wish, top it with a teaspoon (or less, depending on your hot and spicy tolerance level) of spicy Kicap Sambal. (It is like the Somali Bizz Baazz).
  4. Eat it with fork and soup spoon, or if you're feeling dexterous, chopsticks.

Baked Ziti


My older sister is our resident Italian cook in the family. I had my sister's baked ziti for the first time a few months ago. I attempted weeks ago to make her baked ziti recipe. I changed a few things around for this one. Instead of ziti, I used rotini. You can also use penne or any other kind of pasta you like. I just happen to love rotini!

Here's what you'll need
- spaghetti sauce (baked ziti is delicoius with a really good tomato sauce. You can use your favourite recipe or you can use my recipe posted here.)
- 1 lb of rotini pasta
- 2 cups of mozzarella cheese, shredded
- 1/2 cup of shredded cheddar cheese (next time I'd omit this... I'm not a cheese person, so more than 2 kinds of cheese is too much for me)
- around 150 grams of ricotta cheese
- whatever spices you prefer (I add spices in my sauce and not directly on the pasta)

Recipe

1. Make your sauce and sit it aside.
2. Make your pasta. Preheat your oven to 350 degrees at this point.
3. Mix your pasta with as much sauce as you prefer, and mix it really well.
4. Add your ricotta cheese, cheddar cheese, and only 1 cup of your mozzarella cheese and mix well.
5. Top with 1 layer of your sauce and your remaining 1 cup of mozzarella cheese.


6. Bake for 35 minutes.


Serve with a nice salad and a slice of garlic bread.

Enjoy!

Wednesday, November 26, 2008

Chicken Sukhaar


I've already shared my beef sukhaar recipe here. My chicken sukhaar recipe is exactly the same except I use small bite size chicken pieces. I normally add more spinach but ran out so that's why there isn't too much in the above photo. Follow the recipe here!

Enjoy :)

Sunday, November 23, 2008

Soup for A Wintry Day

Nothing like a hot soup to take the edge off the biting cold of winter. This soup brought back memories of a wintry day years ago. If I'm not mistaken, it was during the blizzard of '04. I love blizzards. We got a lot of them in Iowa. I loved it then because it usually meant classes were canceled, though since it's Iowa, it took a really bad blizzard for them to cancel classes. I love it here because it meant family time, since we would all be stuck at home, especially hubby.

There is something tranquil and calming, not to mention sentimental, about being in the middle of white. It's the purest white you could ever imagine, making you forget that there's filth and dirt underneath. It gives you a sense of calm and hope, not to mention utter serenity.

Physiologically, I'm not too joyful about it, because to be honest, I can really do without the frigid temperature, but ahh..such is life. We don't always get what we want. It's all in the package. You can't pick and choose. Take it or leave it.


A bowl of steaming hearty soup is a welcome food item in such a condition. Especially when your kids have spent minutes outside building ice castles with slabs of ice and your husband has shoveled packed and dense snow from the walkway and around the van. Dashing in the door, exhaling puffs of little dragon breaths, the kids squealed with delight that there was something hot to come inside to. Hot cocoa is their favorite. There were times when I found myself making cups and cups of hot cocoa again and again while they dash in and out again and again. Imagine the hot hearty soup traveling down your throat, warming you inside out all the way to your almost numb extremeties. A welcome item indeed.

The first time I had red lentil soup was when we were invited to a Jordanian friend's house. I personally am not used to thick soups and don't really care for them. But as soon as I put the spoonful of soup to my lips, I knew I had fallen in love. There was no turning back. I asked her for the recipe. And here is my version.

Red Lentil Soup


1 lb packet of red lentils
1 onion, minced/pounded
5 cloves garlic, minced/pounded
1 stalk celery - sliced
1 carrot - sliced
1/2 Roma tomatoes, cut into small chunks
1 Tablespoon ground cumin
2 Tablespoons ground coriander
2 Tablespoons black pepper
1 Tablespoons tomato paste
2-3 Cups water


1. Soak the lentils for about an hour or so (some packets say they don't need to be soaked though)
2. Heat oil in a deep saucepan and saute the onion and garlic for about 2 minutes
3. Add the carrot, celery, tomatoes, tomato paste, cumin, coriander and continue sauteing till they're soft and fragrant
4. Add the drained red lentils and water and bring to boil
5. Simmer until lentils are cooked
6. If you have an immersion blender, blend the soup until you have a smooth consistency (or if you like it slightly chunky, stop before it's smooth)
7. Season with salt and black pepper


Cook's Notes:

  • The longer you saute the first few ingredients before dumping in the red lentils, the more flavor you're going to get, because sauteing extracts the flavor of the ingredients.
  • I didn't have an immersion blender, so I blended the hot soup in a normal blender. If you do this, be very careful because blending a hot soup can create a red lentil soup volcano. What I did was to hold down the top of the blender with a wad of cloth so if the contents do threaten to spurt out, there is something between it and my hand or face.
  • The amount of water I gave above is an estimation. You can adjust your soup's thickness, but try to keep it on the thick side.

Other versions of red lentil soup

Ethiopian-Inspired Red Lentil Soup from Fatfree Vegan Kitchen
Red Lentil Soup from Cream Puffs in Venice
Spicy Red Lentil Soup from Vegetarian Times


The red lentil soup I recently made (to finish up the packets of lentils sitting around in the bin under our dining table), I ate with tortilla that I reheated by way of steaming. It almost tastes like roti canai (paratha) eaten with thick non spicy curry. Even Zeyoudee loved it. And there I have my allergy free roti canai breakfast (MalaysianFood.net).

Saturday, November 22, 2008

Pumpkin-Cheesecake Pie


I was browsing through some of my favorite food blogs and came across this amazing looking pecan pie recipe.  I LOVE pecan pie.  I'll be posting that recipe and pictures next.  I made a batch of the Perfect Pie Crust put it in the freezer.  In the meantime we got invited out so I decided to make another pie to take with the extra dough.   Thats when I found this recipe for Pumpkin Cream Cheese Pie.  If you like cheesecake and you like pumpkin pie, then this recipe is for you!  On a side not if you want a Pumpkin Cheesecake check out this recipe from the Pioneer Woman!

Here is the recipe reposted from http://howtoeatacupcake.net.


Pumpkin Cream Cheese Pie from Better Homes and Gardens: New Baking Book
Prep: 20 minutes - Bake: 1 hour
Makes: 8 servings – Oven 350F

1 recipe pastry for single-crust 9-inch pie
----------------------------------
1 8-ounce package cream cheese, softened
1/4 cup granulated sugar
1/2 teaspoon vanilla
1 slightly beaten egg
----------------------------------
1 1/4 cups canned pumpkin
1 cup evaporated milk
2 beaten eggs
1/4 cup granulated sugar
1/4 cup packed brown sugar
1 teaspoon ground cinnamon
1/4 teaspoon salt
1/4 teaspoon ground nutmeg
----------------------------------
1/2 cup chopped pecans
2 tablespoons all-purpose flour
2 tablespoons brown sugar
1 tablespoon butter, softened

1. Prepare and roll out pastry. Line a 9-inch pie plate with the pastry. Trim and crimp edge as desired; set aside.
2. In small mixing bowl beat cream cheese, 1/4 cup granulated sugar, the vanilla, and the 1 slightly beaten egg with electric mixer on low to medium speed until smooth. Chill in refrigerator for 30 minutes. Spoon into pastry-lined pie plate.
3. In a medium mixing bowl combine pumpkin, evaporated milk, the 2 eggs, 1/4 cup granulated sugar, 1/4 cup brown sugar, cinnamon, salt, and nutmeg. Carefully pour over cream-cheese mixture.
4. To prevent overbrowning, cover edge of the pie with foil. Bake in a 350F oven for 25 minutes.
Remove foil. Bake for 25 minutes more.
5. Meanwhile, combine the pecans, flour, the 2 tablespoons brown sugar, and butter. Sprinkle
over the pie. Bake for 10 to 15 minutes more or until a knife inserted near the center comes out clean. Cool for 1 to 2 hours on a wire rack. Refrigerate within 2 hours; cover for longer storage.

Nutrition Facts per serving: 477 cal., 29 g total fat (11g sat. fat), 122 mg chol., 295 mg sodium, 46 g carbo., 2 g fiber, 10 g pro. Daily Values: 103% vit. A, 4% vit. C, 12% calcium, 17% iron

At first I wasn't going to use the pecan topping but then I decided to since I had extra from the pecan pie and it was delicious alhumduliah!


Oh ya... and I didn't have a pie pan and I wanted to give my friend her pan back so I made a square pie! LOL

Tuesday, November 18, 2008

Potato Soup

Before I had my surgery I cooked myself up a batch of delicious potato soup to eat when I got home from the hospital! I didn't really follow a recipe and since I'm not really up to trying to remember how much of each thing I put in I'll just post a basic rough recipe which can be changed to ones liking. I like my soup a bit chunky, but you can blend it as well.

Ingredients:

3-4 tablespoons butter
1/2 large onion diced
4-5 meduim potatoes any variety, chopped into small to medium sized pieces
Salt, pepper, garlic powder and herbs (I used oregano, thyme and chives)
Water or Stock
Milk or cream or both

1. Heat the butter in a meduim saucepan and saute onions until translucent.
2. Add potatoes and saute lightly.
3. Add seasonings and water/stock enough to just cover potato.
4. Bring to a boil and simmer for 15-20 mintues.
5. Add milk and/or cream and continue to simmer on low until desired consistency. Add enough to make it pretty thin because it thickens up as the potatoes finish cooking and after it cools.


Saturday, November 15, 2008

O-HI-O


A Malaysian brother's graduation. Perfect! An occasion to bake and decorate a cake for. An excuse to fling open the restless idea box in my head. An excuse to launch yet another experiment. A reason to practice my cake decorating skills. I can almost feel the itch consuming my hands at the time, as I'm typing this now, years later.

Hubby had volunteered to organize a graduation celebration gathering for the brother, whose parents had come all the way from Malaysia. The gathering was done at our place, and the cake was to be a surprise.

I don't remember exactly how I came about with the idea for an OSU cake, but then again, the previous graduation cake I had made for the Malaysian brothers was OSU in nature too. However, the first thing I did to botch this cake up was the color of the base cake; pink. Malaysian brother, pink. Get it? Uh uh, not a good color, though those of you who notice that Malaysians tend to be 'colorful' may think,

Isn't that normal though? Their men wear purple, green, pastels, so why not pink?

Well, I guess some of our men do wear pink, but I personally wouldn't associate my boys, or husband for that matter with the color pink. So, to me, it was a flaw. The first flaw for this cake.

However, it took so much coloring to make it dark red, and I didn't want to use more lest we end up with more red coloring than the cake in our tummies, so I settled with dark pink. The bottom tier were two 10 inch cakes, filled and frosted with buttercream. I had somehow managed to get a portion of the frosting dark red (it takes some time for the color to take on a deeper and darker shade), and I used it for the borders.

Since there were about 20 and more people coming, I decided to make a two-tiered cake. It had to be OSU in nature. OSU it was. It was difficult to get that black too (which was actually a very dark gray), but I got it. At least it looked black.

I baked two 8 inch cakes for the top tier, and carved them out, using a template I had made out on parchment paper, so they would have the outline of the Ohio State logo. I filled and frosted the carved cakes, and voila, I had a perfectly clean slate to make my OSU logo. From there on, it was ... nerve-wrecking cake decorating. I couldn't botch that up.


Looking back, I should have made the top tier 6 inches, because 2 inches of a difference is not enough for a two-tiered cake. I had thought that the carving would make the 8 inch cakes smaller, but I was wrong. Another botch up. Sigh...


Making the Ohio State logo was definitely not easy. I used a toothpick and carefully drew it out on my clean slate. The nice thing about it, is, when I made mistakes, I could easily 'erase' it by smoothing out the frosting, and start over.I do believe this would have been easier with rolled buttercream or rolled fondant though.

I have to say, that the hardest part is centering the huge, long S, because those two words, and how they are placed in this whole thing, depends largely on the S. That darn ! I have had to start over so many times because I had started with Ohio instead of starting with the S. Nevertheless, alhamdulillah, it turned out presentable.


The base or bottom tier was easy. It was like any other cake I've decorated; straightforwardly border making and writing. For this cake project, I had also decided to test a principle in Physics as an excuse to saving some dollars. Since a hollow cylinder is supposed to be stronger than a solid cylinder, I decided to test it out by using straws instead of buying some dowel rods at the cake store. And of course I had to botch things up yet again. After poking all the straws deep into the bottom tier, I realized that I hadn't cut them all at the same precise length. I debated whether to take them all out and cut new straws, but I held back, and moved on. From the photo below, you can even see that the placements of those straws were not carefully planned. Ahh...the work of a beginner.


Nevertheless, the unevenness was not so much as to make it all a big embarassing flop. The straws did their job and that principle in Physics was proved true, and my dollars saved. The top tier did seem to float awkwardly above the bottom tier though, since the height of the straws were not precisely the same, and I had cut them a little taller than they should have been.


All in all, I wasn't completely happy with this cake, as my perfectionist eyes saw all the glaring flaws, but it made the brother happy, so I guess, I couldn't ask for more. Alhamdulillah! It was homemade, customized, and full of faults. The cake didn't turn out as perfect as I wanted it to be, but alhamdulillah, I committed mistakes that I could learn from. Looking at this cake, I will always remember the 4 inch rule: the difference between the diameter of the bottom and immediate top tier would best be 4 inches, not less, not more. And of course, the straws...I will never forget those straws.


Friday, November 14, 2008

Lemon Pancakes


The egg whites man got me craving lemon pancakes today! I'm such a breakfast person too- my favourite meal of the day for sure. So I went searching online for recipes that I could try, and I finally found this one. I omitted the cream soda cause I didn't have any, I added 1/2 cup of lemon juice, and I used 1% milk instead of skim milk, but it was absolutely delicious! Possibly my favourite pancake recipe yet.

Try it out yourself!

(I realized after making this that I could've used his recipe too!)

Thursday, November 13, 2008

A Squeal, A Whoop of Joy!

Four tries. That's how many tries it took for me to come up with a banana cake you won't believe is allergy free!

We had bought combs upon combs of banana so Z and I would have easy accessible snacks. Of course, after a while, these bananas screamed to be used up in something because they were starting to freckle. I had already made the allergy free Jemput Jemput, and on the same day, I had also made two banana cakes, allergy free, but they were not satisfactory at all.

So, I decided to have another go at it, this time, incorporating my baking know how, alternating the dry ingredients with the wet ingredients. I decided to stick with coconut milk for the liquid. Rose Beranbaum's recipe for Cordon Rose Banana Cake had used sour cream, and so far, this cake is the BEST banana cake I've ever tasted in my life, and I have tried quite a few banana cake recipes. So I figured I'd best be sticking to a creamy liquid in my recipe.


On my first try, I forgot to include sugar, but I also thought I didn't need it because the bananas were already sweet. When the cake was done, I took it out. I had peeked while it was baking, and when I saw it rise, my heart leapt for joy, but I told myself not to be too excited because it could still turn out to be a flop. So, I took it out when it was done, and let it cool in the pan on the cooling rack before I inverted it and took it out. While it was cooling, I cleaned the kitchen. I tried hard to ignore it, for fear of facing yet another disappointment of a hard rock and untasty cake after so much work of deciding a measured amount of flour and other ingredients and writing them down on one of my recycled grocery lists paper.

But I finally could not ignore the cake any longer, and I gingerly inverted it. I couldn't help myself, so I lightly pressed it. It sprung back. My heart started to beat faster. I grabbed a knife, and started slicing. It was soft. My heart felt lighter. I took one cut piece. It felt fluffy and tender. My heart probably grew wings. I put the piece in my mouth. Heaven! My heart leapt right out along with my voice,

"Kids!!!!!!!!!!!!!! Come !!!!!!!"

They were all upstairs playing 'Sultan's kids'. They bounded down the stairs. One by one, they popped a piece of banana cake and nodded their approval. I squealed. Now I know how Alexander Graham Bell felt.

The first cake lacked sugar, and at first it tasted bland, but after a while, you could taste the banana. I decided to have a second go though, this time, adding 5 tablespoons sugar.

Meanwhile, Zeyoudee had his first cake, and the rest of us couldn't keep our hands off the cake, and before I knew it, there was no more First Banana Cake left. The second try was baking in the oven, and I peeked again. It rose. Alhamdulillah!

When it was done, cooled and all, well, maybe not all the way through, but I couldn't wait anymore, I cut it. It was gummy. I felt a tad disappointed, blaming the sugar, but after a while I realized that it was underbaked. I had taken it out too soon. So I still consider it a success, allahu akbar!

Personally I prefer the sugarless one though. It is healthier. So I have cut down the sugar to only 3 tablespoons in this recipe.


Zeyoudee's Banana Cake


1 C blended banana
1/2 C coconut milk
3 Tbs sugar
1/2 C brown rice flour
1/4 C sweet potato starch
1/4 C buckwheat flour
1 tsp salt
2 tsp baking powder
1 tsp baking soda
2 egg replacers (3 tsp Egg Replacer + 4 tbs warm water)
2 tsp oil

Preheat oven to 350 Fahrenheit. Lightly oil an 8 inch round cake pan, bottom and sides, and line the bottom with parchment paper, and lightly oil the top side of the parchment paper too. Sprinkle some brown rice flour, and shake the pan to distribute the flour across the greased bottom and sides of the pan, and dump out the excess.

1. Combine blended bananas, egg replacers, sugar, beat till combined, then add oil and beat again
2. Meanwhile, combine flours, baking powder, baking soda, and salt in a separate bowl and stir to distribute them evenly
3. Add the dry ingredients in 3 additions alternating with coconut milk, meaning, you first add a couple spoonfuls of the dry mix to the banana-egg mix and beat it till combined. Then you add 1/3 -1/2 of the coconut milk and beat till combined. Then add the dry mix again and keep alternating, but make sure you end with the dry mix. Here, on Chef Talk, the science behind this alternating method of mixing is explained.
4. Bake in 8 in cake pan (greased) for 20-25 minutes or till it springs back when lightly pressed
5. Cool cake in pan on cooling rack for 10 minutes
6. Slide knife around the edges to loosen the cake, invert it onto the rack and slide the pan off. Cool cake completely on the rack.


Cook's Notes:


  • I used Ener G egg replacers. The directions for use is on the box.


  • Make sure you blend the banana in a blender till smooth. This is so you get a smooth consistency for the cake. Mashing the banana will not result in a smoothly textured cake.


  • Instead of using butter or Baker's Joy spray to grease the pan, I suggested using oil, to make this truly dairy free.
My next try is ... carrot cake, or apple cake, inshaallah.

Something Milky, Something Cold, Something Mexican...


I have eyed this recipe for the longest time, but I always put it back in the recipe box, intending to try it some 'other' time. So there it sat, in my recipe box, among my other handwritten recipes, lovingly yet arduously copied manually, by hand, at night, after the three kiddoes entered la la land. This was during the times when I was a young mother of three children under the age of 3. My days were exhausting, but my interest in baking, cake decorating, sewing, and cooking was equally high, thereby pushing me to check out cookbooks upon cookbooks from the public library. On the couch I would sit, and I would pick out recipes that appealed to me. Like a good student, (alhamdulillah my college days were over then) I sat and copied the recipes on index cards, which now fills two big 4 x 6 index card containers and 1 3x5 index card container. There are still some recipes that I haven't yet tried to this day, but alhamdulillah I did end up trying this recipe; the Three Milks Cake: Tres Leche, a dessert famous in Latin America. Although it took me about 5 to 6 years to finally try it.

Who would have thought that a simple cake doused generously in three kinds of milk, slathered with whipped cream, and refrigerated, would taste so divinely like ice cream?

Tres Leche: 'Three Milks' Cake


1 1/2 C cake flour
1 tsp baking powder
1 C sugar
1/2 C butter softened
5 eggs
1/2 tsp vanilla
1/3 C milk

Milk Syrup:
1 C sweetened condensed milk
1 C evaporated milk
1 C whole milk


Topping:
1 C heavy cream
1 tsp sugar
1/2 tsp vanilla
Preheat oven to 350 F. Prepare a 7 x 11 x 2 cake pan by lining it with parchment paper and greasing the bottom and side with butter and then coating lightly with flour. Or you could just spray the lined pan with Baker's Joy.

Cake:

  1. Sift cake flour and baking powder
  2. Cream butter and sugar. Add eggs and vanilla till foamy
  3. Fold in dry ingredients alternately with milk in three additions
  4. Bake on middle rack for 30 minutes
  5. Cool in pan on rack 20 minutes
  6. Invert onto platter (I used a 13 x 9 pyrex dish, slightly bigger than the cake)
  7. Pierce cake all over with fork. Let cool completely.
Milk syrup:
  1. Whisk to combine; condensed milk, evaporated milk, and whole milk
  2. Pour over cake and refrigerate covered at least 3 hours(the milk will be absorbed by the cake and seep in through the pierced holes)
Topping:
  1. Beat heavy cream till it thickens
  2. Add sugar and vanilla till stiff peaks form
  3. Slather topping over cake when ready
It may look like a normal butter cake with whipped cream as topping, but trust me, it doesn't taste like one. It tastes better!


Cook's notes:

  • Unfortunately, I don't remember where I attained this recipe, but it's not my own.
  • Make sure the platter has sides, because the milks will require containment before they're absorbed by the cake.
  • Make sure you do use the pan size specified above, because if you use a bigger pan, your cake will be too thin, and if you use a smaller pan, your cake might rise and deflate, or overflow. In my Joy of Cooking, there is a chart for the capacity of different cake pans, that is really a boon when it comes to wondering if a different sized cake pan will do for a recipe that specifies another. Unfortunately, that book is already safely packed away, but there are some resources on the net. Here is a list of some of them:

Home Baking Association


Tuesday, November 11, 2008

Ground Beef Spaghetti Sauce

Often times I ask myself why I didn't watch my mom cook more often while I was home! She ran her own restaurant for a little over a year, and yet I still didn't learn from her.

"Why don't you bring your girls in the kitchen?" her friends would ask, baffled at the fact that we were over the age of 15 and still having our mother cook for us.

One of the first things I learned to make was spaghetti sauce. You can't possibly run a Somali household and not make pasta. I thought long and hard trying to remember what ingredients my mom used. Determined to make it without calling her, I experimented until I made it just right.

So, here's my ground beef spaghetti sauce recipe:

You'll need:

- half a pound of ground beef
- 1 jar of Primo's tomato and basil spaghetti sauce (or any spaghetti sauce of your choice)
- one whole onion, chopped
- red and green bell pepper, chopped
- 3 garlic cloves
- 1 Maggi chicken cube
- a handful of chopped parsley
- 1 lemon

Recipe:

1. Boil the ground beef in 3-4 cups of water on medium heat.
2. When there is very little water left, add your jar of spaghetti sauce, and 1 maggi cube
3. Add 2 cups of water
4. Add your chopped onion, and your bell peppers.
5. Leave on medium heat for 25-30 minutes
6. Now mince your garlic cloves and chop your parsley, add them to the pan. (The aroma this creates is fantastic!)
7. Squeeze 1 lemon and add it to your sauce, then leave on medium-low heat for 20 minutes and let it simmer

This is delicious with lasagna. (recipe coming soon!)

Enjoy :)

Allergy Free Banana Ball Fritters


If not for Zeyoudee's allergies and a sister's determination in conducting her own kitchen experiments (despite not having any problems with allergies herself), I might have never learned about the properties of different types of flours, the different function of eggs, and eventually be moved to hatch some recipes of my own in concocting something my little Zeyoudee can eat without breaking into hives and going into a fit of coughing and wheezing, alhamdulillah!

It took me a while to get used to eating baked goods made with rice flour, and getting used to drinking rice milk. Rice flour is particularly grainy and gritty, and the first time I ate pancakes I made using rice flour, I was quite disappointed. Brown rice flour though, makes a huge difference!

I had made this Jemput Jemput with white rice flour first, combined with buckwheat flour. It tasted like...rice flour. It was okay, but I decided to try making it with brown rice flour. And it tasted...better.


The only thing I had to deal with was that it would brown very quickly compared to the Jemput Jemput made with normal flour. And I think this probably has something to do with the color of the buckwheat flour, which is somewhat grayish. It also tends to be crispy on the outside, but very fluffy and soft on the inside.

There I was, evaluating and critiquing my allergy free version of Jemput Jemput Pisang, yet when we handed some to Zeyoodee, he joyfully stuffed them in his mouth, simply happy to have yet another new thing to eat. Crispy, fluffy, I don't think he cared. Alhamdulillah!

And alhamdulillah, we gave him something that had coconut milk (coconut is considered a tree nut) days before, and he didn't have any reactions. So that opened up more possibilities for him, and I was beyond elated. He will be a true Malaysian. That means, I have to learn to make these Malaysian desserts now, after avoiding them for years because I couldn't rely on Malaysian recipes that are usually simply written as recipes, as opposed to western cookbooks that also include the science of chemistry behind baking. Let's just say I'm kind of a geek when it comes to following recipes. I want to know the whys, hows, in addition to the recipes. In fact, I don't like it when a cookbook just has recipes but no explanations.

And thus, the Cake Bible, by Rose Levy Beranbaum, is one of my favorite and most treasured cookbooks. Recently I also discovered her blog, and I have to say, it's one of my greatest 'stumble upon' on the internet. Ahhh....however, I have moved from the world of baking to the world of baking/cooking allergy free, and my favorite allergy free site now, is Karina's Kitchen. But I still owe my first peek into the world science behind the baking to Rose's Cake Bible, among other cookbooks I have amassed throughout the years.


Zeyoudee's Jemput Jemput Pisang


2 bananas mashed
1/2 c brown rice flour
1/4 c buckwheat flour
1 tsp baking powder
1/4 - 1/2 cup coconut milk/rice milk
salt


1. Combine the above together till they make a thick batter
2. Heat oil for deep frying
3. Drop spoonfuls of the batter one by one
4. Turn over to brown the other side
5. Drain on paper towels

Cook's notes:

  • The brown rice flour has to be refrigerated once opened because it can go rancid pretty quickly.
  • For a truly allergy free version, use gluten free baking powder
  • Since it will brown very quickly, make sure to turn it as soon as it browns
  • Wait until the oil is really hot, otherwise it will stick

I know most people probably have no need for an allergy free version, but in case you know someone who has allergies, especially multiple allergies, this will be one of those rare pearls!

Monday, November 10, 2008

When We Went Raspberry Picking...


One year, we went strawberry picking with the Malaysians. When the next summer came, I wanted to pick something else. So I suggested raspberries. I didn't know what raspberry plants look like.

It was a picking I don't want to go through again, at least not in that kind of weather. We were drenched with sweat under the sweltering heat, and those raspberries, they're too small that it felt like forever to fill our baskets.

Nevertheless, we did return home with pounds of fresh raspberries, which in turn, gave me a whole afternoon of bustling in the kitchen. I grabbed some recipe pamphlets from the Farm, and on the way home, started planning what I was going to with those raspberries before they go bad.


I made raspberry puree and froze them for my future cake creations. I made raspberry roll, and I made Raspberry Cream Cheese Coffee Cake, which we ended up giving to the Malaysian brothers because we had too mych raspberry baked goods in the house by the time I was done. By the time I was done, I was also completely exhausted, but it was worth it, because hubby came back from the brothers' house with a clean dish. He said the brothers loved it.

For a while, I thought I had lost the recipe, and while the kids and I were looking at the photos, my oldest daughter said,

You have to make this again," pointing at the photo of this Raspberry Cream Cheese Coffee Cake.

I told her, "I don't know where the recipe is."

But, today, as I was sorting out my recipe box while packing, I found it.

"I found it!" I exclaimed.

"You can make it then," she replied.

"No, raspberries are expensive."

"Do they have raspberry picking in New Mexico?" my younger daughter asked.

"No."

"In Malaysia?"

I chuckled to myself before saying, "No."

Poor kids.

So I guess we'll make it when the opportunity arises, inshaallah.


Raspberry Cream Cheese Coffee Cake


Filling:

12 oz cream cheese, softened/at room temperature
1/3 C sugar
1 egg
1 Tbs lemon juice
1 tsp vanilla


Streusel:
1/2 C (1 8 oz stick) butter, softened/at room temperature
1 C sugar
2/3 C all purpose flour
1 1/2 tsp ground cinnamon
1/4 tsp salt


Batter:
1/2 C (1 8 oz stick) butter, softened/romm temperature
1 1/4 C sugar
2 eggs
2 tsp vanilla
4 C all purpose flour
1 Tbs + 1 tsp baking powder
1 tsp salt
1 C milk
3 C fresh raspberries


  1. Preheat oven to 375 F
  2. Butter a 13x9 glass oven proof dish

Filling:

  1. Cream cream cheese and sugar
  2. Add egg, lemon juice, and vanilla
Streusel:
1. Blend butter, sugar, flour, cinnamon, and salt

Batter:
  1. Beat butter and sugar
  2. Beat in eggs, and vanilla till light
  3. Whisk flour and baking powder and salt
  4. *Add the flour mixture slowly to batter in 3 additions, alternating with milk **Fold in raspberries gently
  5. Spread 2 1/2 cups batter in the dish
  6. Spread filling evenly on top
  7. Drop spoonfuls of remaining batter on filling
  8. Spread evenly, sprinkle streusel over
  9. Bake on middle rack for 1 hour and 5 minutes or till golden
  10. Cool completely


Cook's Notes:

  • * For better mixing, the dry ingredients are added to the creamed butter alternately with the wet ingredients. The first addition would be the dry ingredients, 1/3 of it, then mix till combined, then 1/2 of the wet ingredients (in this case, milk) and mix again, then the dry ingredients, and so on. The last addition will be the dry ingredients.
  • ** Folding is not the same as mixing or stirring. Folding ensures that the air we have worked to hard to trap in the batter is not released by stirring.
  • I used an oven proof 13x9 oven proof glass dish. Use a 13x9 dish, oval or rectangular.
  • The reason why the cream cheese and butter were required to be at room temperature is so the mixing will be easier. Just take out the butter and cream cheese sometime way before you plan to make this so by the time you do, they will be at room temperature.
  • However, if you're in a rush, and don't want to wait for them to come to room temperature, or are afraid that if you wait, you will lose the motivation to make this at all (like what always happens to me, and I believe, my mom ;), just cream the cream cheese by itself with the mixer until it's soft, and the same with the butter.
  • It's also better if the eggs are also allowed to come to room temperature so you will get more volume. (There is a whole dos and don't related to cake making that I cannot elaborate on here, unfortunately).
  • A demo on folding (we're not talking laundry):


Well, I guess, we'll be waiting ages before we make this again, if we do return to Malaysia, unless we substitute something else for the raspberries that is. Hmm...maybe mangoes, mangosteen, jackfruits, guava, durian, rambutan...ohh...the possibilities!

Sunday, November 9, 2008

Double Chocolate Obama Cupcakes


My plan was to make double chocolate cupcakes and spell out 'Barack Obama 08' by writing on them with icing. Unfortunately, I didn't get everything on time, so I stuck with store bought chocolate icing. I made these the day before election night. Enjoy :)


I followed Rachael Ray's recipe which can be found here. (the only difference is I didn't make the icing recipe on the site- I stuck with store bought Betty Crocker chocolate icing.)

Home Fries


I first fell in love with home fries after a couple of trips to Bob Evans with a few addict friends of mine ;)

Having cut down on eating out, I decided I would try to make them at home. Here's what you'll need:

- 5-6 large potatoes
- butter
- salt
- paprika
- pepper flakes
- garlic powder

Recipe:

1. Boil your potatoes on high heat for 10 minutes (only cook them half way, do not boil more!)
2. Remove from boiling water and wait for potatoes to warm, then chop into small pieces
3. add 1 teaspoon of salt, some pepper flakes, 1 tablespoon of paprika, and one tablespoon of garlic powder, mix thoroughly
4. Heat a non stick pan on medium-high heat, grease if necessary.
5. Add your home fries to the pan, and add 2 tablespoons of butter. Let it sit on medium-high heat until a gold brown colour is achieved, then leave it on low-medium heat.

This is best with pancakes and eggs!

Saturday, November 8, 2008

Cheesy? Yum!!


One of the easiest dish to prepare, and one of the easiest to make ahead and freeze for lazy cooking days, or for hectic days for that matter! I present, the Cheesy Yum. The name..ahh, the name was borne out of three active young minds; my children.

I no longer make this because I can't take cheese, so I have been depriving the family of this dish the kids particularly love. Bad mother? Nahh...just being practical. A Cheesy Yum at the expense of an exhausted mother who no longer wants to cook anything because she has to cook two separate meals, one for her and another for the family, because of the allergies, is simply not worth it. Either they put up with it for a while, or forgo her cooking forever.

This dish is very versatile. I love the fact that it can be prepped ahead of time, refrigerated, and baked the next day. Or, it can also be baked, cooled, cut up into generous squares, wrapped up, frozen, and voila! You got yourself a homemade frozen dinner!

Cheesy Yum

1 1 lb. 9 oz. jar spaghetti sauce
1 box/ packet of spaghetti
2-4 cups grated cheese (mozzarella and cheddar) enough to generously sprinkle over the dish
1 medium-sized onion, minced
5-6 cloves of garlic, minced
dash of chilli powder (can be omitted)
2 Tsb oil
1 lbs ground beef

Preheat oven to 350 Fahrenheit
1. Cook the spaghetti , drain, set aside
2. Heat oil and saute the minced onion and garlic till fragrant
3. add ground beef and stir for about 3-4 minutes
4. Dump in the spaghetti sauce
5. Cook till beef is done
6. In a large bowl or in pot (if it's big enough) combine the cooked spaghetti with the cooked sauce
7. In a 9 x 13 casserole/pyrex dish, pour this mixed spaghetti combo
8. sprinkle grated cheese over it, and bake in the oven until the cheese melts and browns a little bit
9. Cut immediately into serving size pieces, and dig in while the cheese are still gooey and soft!

Cook's Notes:

  • You can also prepare up to step 7 and put it in the refrigerator to bake the next day
  • You can also cool it completely after it's done, then cut into serving size pieces, wrap each piece with plastic wrap/ aluminum foil, and freeze them. You can then have these as your homemade frozen dinners. (Good for large families, or for mothers who have to plan ahead for some occasions/events that require them to cook ahead and store so the family would not be without homemade food)
  • You can also make your own spaghetti sauce as below:

  1. Saute the minced onions and garlic till frgrant
  2. Add 2 Tbs tomato paste
  3. Add 1 lb. ground beef
  4. Add 1 can tomato sauce
  5. Add salt, pepper, oregano, and any other additions you like in your spaghetti sauce
  6. Cook till beef is done

Grated cheese; check.
Spaghetti; check.
Spaghetti sauce; check.
Onion, garlic; check.
Ground beef; check.
Oil; check.

What are you waiting for? Cheesy? Yum!!


Thursday, November 6, 2008

Beef Sukhaar


Beef sukhaar, or tender beef chunks is a staple Somali dish. It can be eaten for breakfast, lunch, or dinner. It can be sauteed with vegetables of your choice and can be served with anjeero, malawah, or pita bread. I serve it with store bought pita bread or naan when I'm running low on time- like I did today :)

This takes about 1 hr-1hr and 15 min total, I leave it on the low heat longer because the meat and veggies become nice and tender.

What you'll need

- half pound of beef sukhaar (small chunks of beef)
- veggies of your choice (I use red & green bell pepper, one whole onion, chopped parsley, minced garlic, 2 tomatos chopped, 4 potatos chopped, 2-3 cups of fresh baby spinach)
- 1 maggi chicken cube
- 1 teaspoon of xawaaji (A somali spice, if you do not have xawaagi, use spices of your choice)
- 2 teaspoons of olive oil
- 5-6 cups of water


Recipe:

1. Boil a half pound of beef sukhaar in water until desired tenderness is achieved. Use more water if you want more of a stew... otherwise use less.
2. After boiling for 25 minutes on medium-high heat, add your tomatos first (before the rest of the veggies) and 1 cube of maggi chicken
3. 10 minutes later, add your small potato chunks
4. 15 minutes after that, add the rest of your veggies (save the spinach for last)
5. Leave on medium-low heat for at least 15-20 minutes, you can add your spinach 5 minutes before you plan to serve it. (I was told if you cook spinach too long, you lose the nutrients...)

Serve with either anjeero, malawah, or any roti type of your choice :)

Going Bananas!


Only after I got to know the Somalis in Columbus did I associate banana with the Somalis, because of the interesting fact that they eat their rice with bananas.

Bananas, all kinds of them, grow in abundance in Malaysia, and I really mean in abundance! When I was prescribed glasses, I devoutly, every single morning after Fajr, headed out to our orchard and struggled to get drops of fresh morning dews from the banana plants (just the banana plants, not tapioca, not durian, not anything else!) into my myopic eyes, as per my grandmother's prescription for curing my myopia. I can still feel the smoothness of the banana leaves, and I can still see those coveted pool of fresh dew breaking into glistening drops as they slid down the central stem of the banana leaf. I'm still myopic by the way, so no, it didn't work.

Since we have a lot of bananas, Malaysians have come up with many ways to eat it, but none of them includes eating it with rice. :) We have fried banana fritters, banana ball fritters, banana in sweet rich creamy sauce, ...err...well I guess that is about it, well at least those that I am aware of (and I'm not really an expert on Malaysian food, despite being Malaysian). You can find banana fritters being sold on the streets by hawkers, freshly fried and still steaming hot. It's usually served for tea when guests come to visit, since it's pretty easy to whip up last minute.


This version, called Jemput Jemput, in Malay (which directly translate to 'invite/tiny portions'). I wondered about the etymology of the name, and asked my husband.

His theory:

1. Because of its size, and the way it's made is by deep frying tiny portions

My theory:

1. It's easily whipped up for guests, and you tell them, "Jemput makan," (Please come and eat! The 'invite' version of the meaning)


Jemput Jemput Pisang (Banana Ball Fritters)


4 overripe bananas, mashed
1/2 cup coconut milk
1 tsp baking powder
1 3/4 cup flour
dash of salt


1. Combine the mashed bananas and coconut milk in a big bowl
2. Add the flour and baking powder and salt
3. Mix with a wooden spoon into a thick batter
4. Heat enough oil for deep frying, wait until it's really hot
5. Take one spoonful of batter, and using another spoon, swipe it neatly, as a ball into the hot oil
6. Turn it over when the bottom is light brown
7. Serve warm as a light sweet snack


Cook's notes:

  • Make sure the oil is hot before you drop your first banana ball in it. If it's not hot enough, the banana balls might stick, and it won't fluff up as much. I learned this the hard way.
  • Turn down the heat a tad if it browns too quickly.
  • Rule of thumb for deep frying: don't crowd the pan or the oil temperature will dip
  • Just like making pancakes, don't overmix the batter, or the gluten will overdevelop and make them tough.
  • Below is a how to video:


Check out other Jemput Jemput Pisang on the blogosphere:

Jthorge's Jemput Jemput Pisang on Jthorge's Kitchen

Brenda Tan's Jemput Jemput Pisang on Mum Loves Cooking

Beachlover's Jemput Jemput Pisang on Beachlover's Kitchen

Wednesday, November 5, 2008

Malawah


For those of you have been asking about the malawah recipe, here it is again. It was down temporarily. Enjoy :D

What you'll need

- 3 cups of all purpose flour
- 1 1/2 cups of milk
- 1/2 cup of water
- 2 eggs
- 1/4 cup of sugar
- 1 tsp of salt

Preparing the batter

Using an electric hand mixer, mix the above ingredients until the batter is smooth and free of chunks.

Preparing Malawah

1. Put a non stick pan on medium-high heat and grease if necessary
2. When the pan is hot, apply 1/4 cup of malawah onto the pan and spread it out in circular motions using a ladle


3. Peek under neath the malawah, when it appears to be golden brown, apply 1 tsp of butter

4. Spread the butter on the malawah and flip


5. When that side is golden brown, you may take it off of the pan and apply a pinch of sugar.
6. Eat :)